This demo will create a Quote document starting from an Opportunity.
From the Opportunity, the following information will be used:
-
Opportunity:
- Id
- StageName
- Amount
- ExpectedRevenue
- CloseDate
-
Account: This is the Account linked to the Opportunity
- AccountNumber
- BillingAddress
- BillingPostalCode
- BillingStreet
- BillingCity
-
Opportunity Products:
- Name
- ListPrice
- TotalPrice
- Description
- OpportunityId
- Quantity
-
Opportunity Roles: We will use the primary Contact Role in this demo so make sure this one is set
-
Contact: Update this data to the contact that is linked to the Primary Contact Role
- FirstName
- LastName
- Full Name
- AssistantPhone/Phone/HomePhone/MobilePhone/OtherPhone (any of these will do)
- Email
- Title
-
User: This is the Owner of the Opportunity
Paste in your Salesforce.com domain...
... And just follow the steps below:
Step
|
Action
|
1) Install PDF Butler
|
|
- This is the installation of the AppExchange package. The install itself might take a few minutes.
|
|
2) Setup Sales Cloud Demo
|
|
- Self-register: a single click to register for PDF Butler. Make sure to COPY the credentials if you want to use the SIGN Butler demo as well.
- Setup PDF Butler config: We setup a DocConfg with a Template to be used on an opportunity. The demo only uses Standard fields.
|
|
3) Add logo to Opportunity Account (Optional)
|
- Account: Go to the Account that is linked to the Opportunity you want to demo from and find the FILES related list.
- Logo: Add a logo of your customer to the Account. This logo will be used in the generated document.
- Logo Name: Change the Title of the File to start with "logo".
|
|
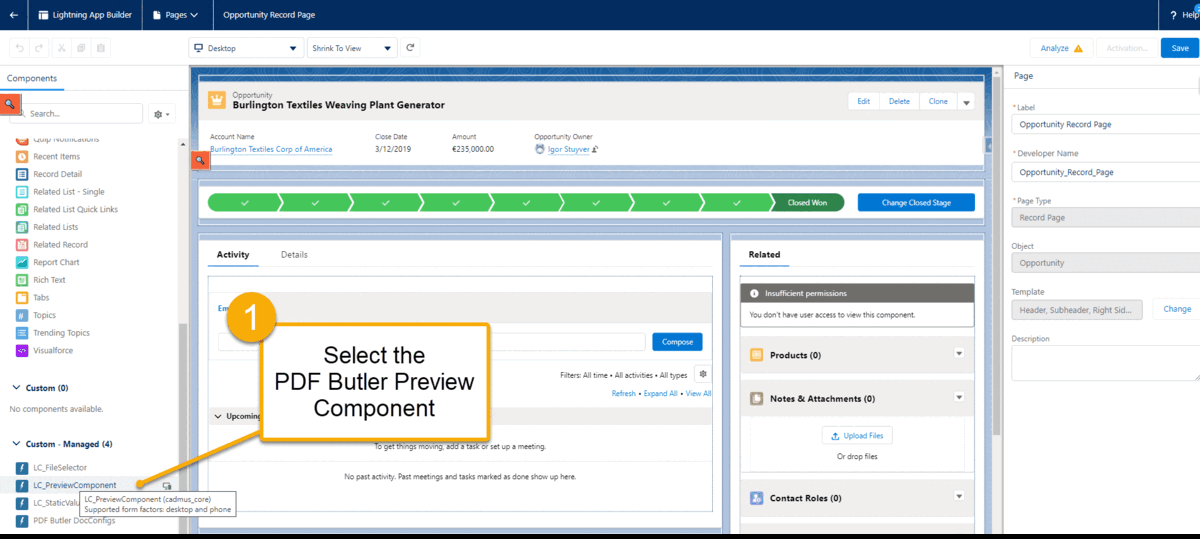
4) Add Lightning component to Opportunity Record Page
|
|
- Edit page: Drag & Drop the PDF Butler Preview component on the Opportunity Record Page.
- Add component: Drag & Drop the PDF Butler Preview component on the page.
- Copy DocConfg Id: Configure the component to use the DocConfig that was added in the previous step.
|
|